Saturday, August 25, 2018

Garter Stitch Cardigan for 18" Doll


Garter Stitch Long Cardigan for American Girl Doll
 

(adapted from 1904 Doll’s Sweater)

I’ve adapted Mary Barnett’s version of a sweater published in The Modern Priscilla in 1904 (www.vintageknits.com/doll.html).  I eliminated the front pouch and narrowed the front sides.  My changes result in a sweater that fits the American Girl Molly Doll like a “car coat”.
Materials
Yarn: LB Collection Merino Superwash Deep Magenta 100g/306yds
Needles #2 and #4
Stitch markers, 2 stitch holders
 Gauge on #4 needles 5.6 sts / 1”.  10-12 rows / 1”
 Note: as gauges vary as to how many rows / ridges per inch, rely on the measurements, rather than the row number.
 Back
Using #2 needles cast on 42 sts.  K2P2 ribbing for ½” or 6 rows,
Change to #4 needles and knit 4” in garter stitch, 24 ridges / 48 rows
Armhole BO 3 sts and beginning of next two rows. Knit for 3” 15 ridges / 30 rows, ending with a WS
Back Neck
K 13 sts;  BO 10 sts; place the 1st 13 sts on a st holder. 

Left Front
Continue on the the last 13 sts for 6 rows (not ridges).
Inc. at neck edge at 7th & 9th rows and knit 3 rows. On 3rd row CO 7 st (22 sts total)
Knit until there are 15 ridges / 30 rows;
Armhole:  CO 3 stitches at beginning of next row (25 sts total)
Continue until front is as long as the back – 4” 24 ridges / 48 rows from armhole
Ribbing: On #2 needles K2P2 for ½” (6 rows) then BO loosely
 Right Front
At right edge use the chained edge stitch
Buttonholes. At front edge: K3 (the 1st st is the chain edge st), BO 2. Next row, CO 2 sts over
BO sts.
Make buttonholes in the “gutter” after 2nd ridge and then every 7th st; the last st. will be in the ribbing
 Sleeves
Pick up and K 38 sts along armhole edge.  K2 ridges then dec. at each end of ridge #3, #6, #9, #12 and #15.  At 3 ½” or 18 ridges.
Ribbing: On #2 needles K2P2 for ½” (6 rows) then BO loosely
 Collar
Edges: use chain edge st
Pick up 36 sts and knit for 9 ridges, BO loosely
28 ridges = 5”
 

Tuesday, February 21, 2017


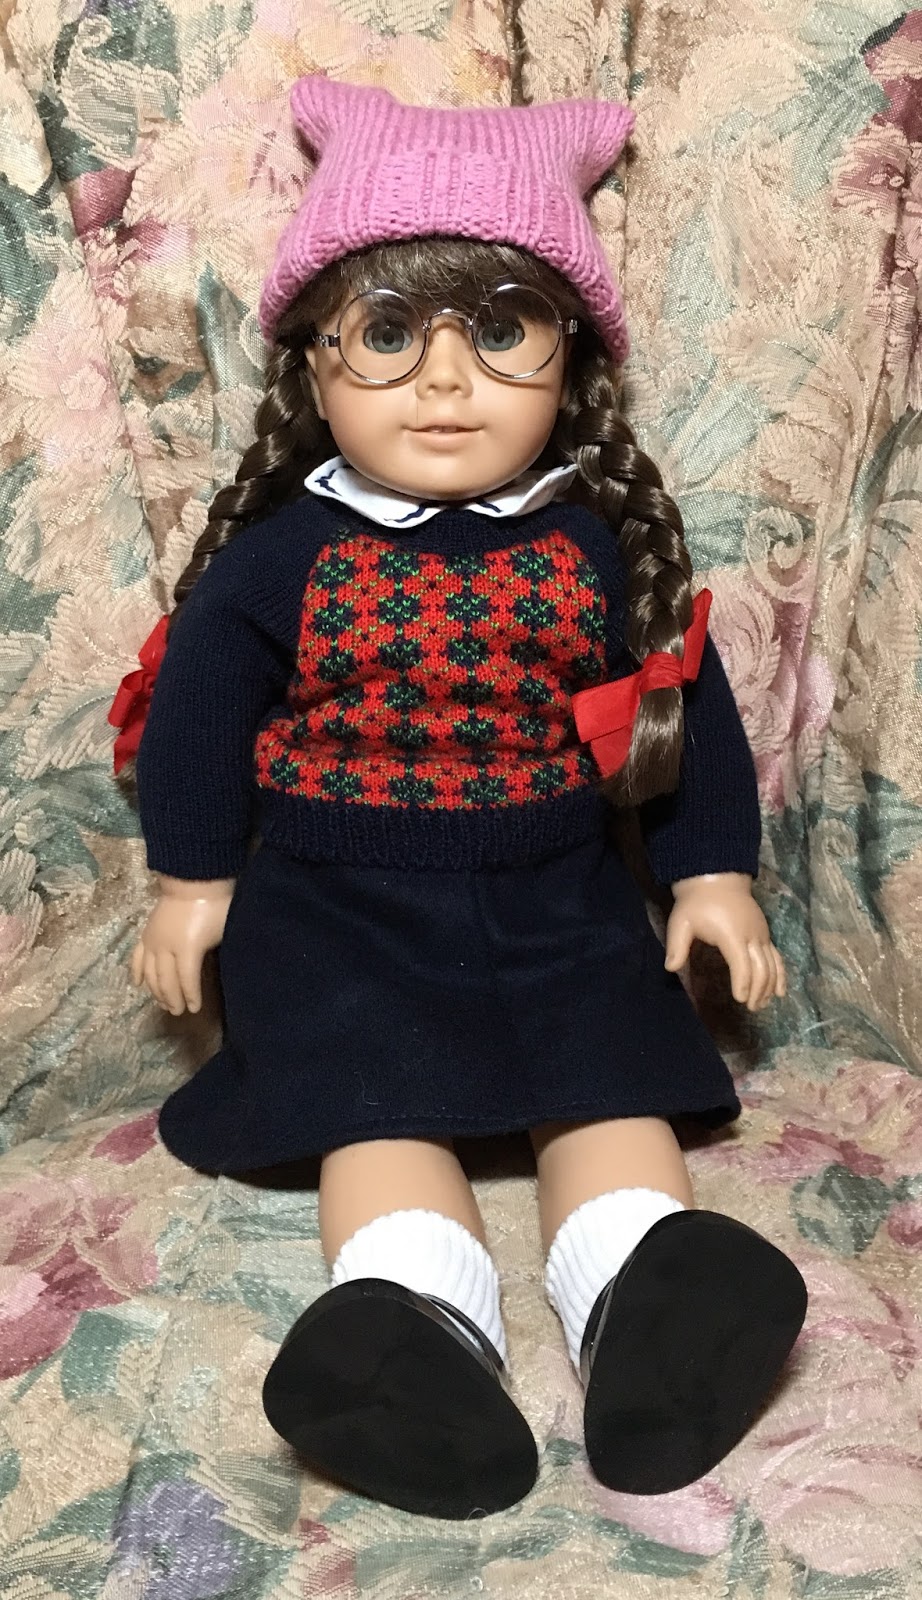
18" Doll Pussyhat

Modeled by "Molly" (American Girl Doll)

Elizabeth F Stabler ; LizaKnitter on Ravelry

Materials
#5 needles, either circular or dp's.  Using circular needles will required the "magic loop" technique
 50-60 yds sport weight yarn, such as Brown Sheep Nature Spun Sport or Cascade 220 Sport
Darning needle
 
Gauge: 20 sts to 4"

Directions
Cast on 60 sts in k2p2 rib.  Continue for 15 rows or until work is  1 ½”long.
Change to st st and knit until the work is 5" long.  Put 34 sts on each of two needles (or the ends of circular needles) and join, using either the Kitchener st or 3-needle bind-off.  
 With a darning needle weave in the loose ends.
Abbreviations
dp’s – double point needles
k – knit
p - purl
st st – stocking or stockingette stitch
sts – stitches
yds - yards


Monday, September 01, 2014

PICC Sleeve


My son-in-law's PICC was inserted at the elbow joint.  Instead of lying flat the PICC is perpendicular to the joint. He therefore needed a PICC sleeve through which the PICC could be inserted and then covered. 


Materials

160 yds  sport weight yarn (I used 2 ¼ ounces of Blue Moon Fiber Arts Socks That Rock Medium)
#3 42 inch circular needle or any length to allow for magic loop technique.
Gauge: 27 sts and 44 rows to 4 inches (6.75 sts to 1 inch)
Finished size: 9 ½ inches diameter, 7 ½ inches long when folded

Chain Edge Stitch 
Work to last stitch.  Pick up strand between the stitch on the right hand needle and the one remaining on the left hand needle and loop it onto the left hand needle.  Bring yarn in front, slip the loop + last stitch onto right hand needle so that the front “leg” of both stitches is in the back (instead of the usual way). Turn the work and to begin next row, knit the last stitch and the picked loop together.  Make sure this is loose because it will make a very tight edge if the yarn is pulled too tightly.

 
Directions
Cast on 64 stitches loosely and k2p2 rib for 1 inch, or 8 rows.
Begin stocking stitch and continue until work from cast-on edge is 4 ¾ inches.
Divide work into two sections of 32 stitches each, designating one as the front.
On the back section continue stocking stitch until ribbing.
On the front, for two rows, k 13, p1k1 for 6 sts, k13
Next row, begin slit. Knit back and forth on the circular needles as if using straight needles, beginning and ending the row at the slit, preferable using the chain edge stitch [Ch Edge] for smooth edges at each end of the row.
Row 1: Ch Edge 1, k2 , p 58 ,k 2 Ch Edge 1
Row 2: Ch Edge 1, k2 ,k 58 ,k 2 Ch Edge 1
Repeat rows 1 and 2 until the slit is 1 ½ inches long, about 20 rows.
Resume circular knitting. 
k2p2 rib for 1 inch, or 8 rows
K1 1 row for the fold line
Begin reverse st st and continue for just under 5 ½ inches from the fold line
k2p2 rib for 1 inch, or 8 rows
Bind off with a very loose bind off