Thursday, August 31, 2006

An Homage to the Red, White and Blue


Finally, they're almost done, these socks for my DB. They are inspired by the enthusiasm for patriotic iconography following 9/11. Yes, I know, the fad became trite way before the socks were finished. What can I tell you? Even though I'm a New Yorker I didn't wish to knit an homage to our fair city in the hue of its native costume -- black. And, I'm not at all fond of orange, white and royal blue, the city's emblamtic colors. So, we decided on muted shades of our national tricolor. This project became a sort of albatross, hanging about the bottom of my current- project knitting bag for almost five years. (At least I didn't have to hang them around my neck.) They're also my first original sock design. Sewing in the loose ends took over over two hours on the one sock I've finished. Why so long? It was late, I was tired (but doggedly determined) and I was seeing double and fuzzy.

Monday, August 28, 2006

UFO's - A Partial List

This weekend we went in Pittsburgh to visit family, arriving Friday evening, leaving Sunday morning. Because I was the driver for the 350 miles each way, I had little knitting or spinning time. But, I did finish one more square for my daughter's wedding afghan. I've acted as "ghost knitter" for a number of friends who want to be a part of the project but can't knit or aren't confident enough. While I tried to encourage them, I did take on about 6 extra squares. For this square I used the dragon scales pattern which drove me absolutely crazy every now and then. I do love it, tho', and figured out how to use it for socks.
Photos later, after they're blocked and/or as a part of the coverlet/afghan.

So, I had a chance to think about my many projects. I'm almost finished with the "Homage to the Red, White and Blue" socks for the DB. On the sticks are also my first toe up socks.
Still to complete:
mermaid Australian cross stitch/needlepoint for one friend
gloves
tank top
baby blanket
my son wants beer bottle cosies -- would you believe?
and, the DB found a partially finished washcloth with a lovely lace stitch I'd adapted.
Many more in the ready-to-go category -- too many to list.

Then, there's the stash.

Time for bed. Hope I don't have nightmares about pointy sticks chasing me...

Monday, August 21, 2006

A Visit to the Beach

This is what a fiber-nerd does at the beach. I'd brought 3 pairs of Noro Silk Garden skeins for my friend's partner to choose from for her [late, of course] birthday present. A committee formed and chose /colorway #87. It's made of 45% silk, 45% kid mohair and 10% lamb's wool. 50g/100m per skein, $11 each.


Pattern
The classic based on Plymouth Yarn's but modified by moi. I use #8 needles because I knit somewhat loosely. Using a provisional cast-on, cast on 72 sts. Pattern is two-fold, horizontally at each end of rows and vertically as the wide ribbing ridges are knit. It's a kind of magic knitting trick which makes a lovely, turban-like hat. Even experienced knitters wonder how it's made. Use yarn that stripes with long repeats of color to take advantage of the striping effect. Or else, adjust the ribbing to fit the colorway. The style flatters a wide variety of heads!

Pattern in Short:
On every other row slip 1, k2tog at beginning of row; continue to last 2 sts; make 1 stitch in next st then k or purl last st. At the same time, make as many wide rib ridges of 4 rows stockingette and 4 rows reverse stockingette as needed to fit head. This hat used 15 complete ridges; it also used up all the yarn -- every inch of two skeins. The cast-on row will form the last row of a complete 8-row ridge.

Wide rib pattern: [*Knit the, next row, Purl next row* 2 times; *purl 1 row, knit 1 row* 2 times]. End with 2 rows matching the cast-on row; the 3rd row will be joined by the kitchener stitch row to the cast on row. Warning: make sure there's enough yarn to knit the required number of complete ridges. To end, pick up the 72 sts from provisional cast on and kitchener st together with the last row. The trapezoidal shape is what makes the lovely diagonal stripes when the cast on edge is joined to the last row of live sts.

Top of hat: After kitchener stitching the edges, you will have a tube. Then pull yarn through stitches at whichever end best fits the intended head. I add a short length of strong fingering weight yarn at this point because the Noro just isn't strong enough to pull through tightly without breaking. This hat can be reversible but I usually do a little extra stitching on the side that has been designated the reverse side so that there isn't a hole where 60 sts (8 rows times 15 divided by 2 because I slip the first st) are pulled together. I usually pull the yarn through the end that was the "make one stitch" edge because it's curved and adds a little extra to the turban look. Turning over the edge reveals the contrasting color patterns on the reveres side which is always somewhat different because of the effects of using a ribbing pattern.

Questions: (I wish I'd photographed this phenomenon and will next time): why is the "k2tog: edge straight and the "Make one" edge curved? It works out but it's what's kept me from making a clapotis.

Noro controversy adddressed
I had one knot in 2 skeins which was very loosely tied. I was able to take out the knot and join the yarn as I normally would when beginning a new skein. No sticks or straw in this yarn -- more common in the Kureyon in my experience. Is Noro worth it? I try to get it on sale but I still think the spectacular colorways well worth it, especially for knitted presents. I also rather like that the colors are spun, not space dyed -- it appeals to my old hippie-wannabe self.

Wednesday, August 16, 2006

Spinning Silk with Jeannine (Jenny) Bakriges, Part III

I've been raving about this workshop for three days now! Not just a learning experience, it was also one of the most congenial classes I've ever been in. Jenny, the teacher, and Ariel, the studio assistant, were perfectly lovely. Jenny was always patient and willing to explain -- even when she'd used up her voice on us. I admire her generosity in imparting whatever she's learned in her career as a fiber artist. Jenny taught us much more than was in the printed curriculum. It was a treat, too, to see her work which I'd only seen in SpinOff. The colors are lovely and the work is beautifully constructed. This is one of the most important things I learned in this class -- the "wax on, wax off" approach to spinning makes a big difference.

Ariel, a fiber arts major, was efficient, helpful and impressively mature. The cat pillow she'd embroidered in a previous class sold for a very nice price at the weekly auction -- I wish I'd bought it. Knowing only how to spin on a spindle, she learned to use a Schacht wheel by the second evening and was spinning like a pro on the last day.

I also have to mention Karen Henderson, the head of the program (no picture, unfortunately) who heads the Fiber: Surface and Structure Program. Peters Valley serves "crafters" and "artists". I am pleased that more of us crafty types can take advantage of some of the offerings. While art vs. craft is a false dichotomy, I don't know another way to name the difference between those of us in craft guilds and those who lean towards a more "artistic" self-definition.

My fellow students were treasures. You know how some workshops and classes may have one or two students you just can't bear? Well, not here. It was fun getting to know my classmates. M. is a Peters Valley afficionada, having taken so many classes. J. raises sheep and has vast stores of both historical and fiber information to share. B. wowed us with an unplanned extra -- a discursion into the native wild moths and the silk they spin. It was a rare and wonderful treat.


Tuesday, August 15, 2006

Spinning Silk with Jeannine (Jenny) Bakriges, Part II


What I Did On My Summer Vacation, Or, What I Learned From Jenny Bakriges.
It's hard not to rave about Jenny. I found her to be a wonderful teacher. Her patience, good humor, frankness and clarity made this among the most successful learning experiences I've ever had. She advocates certain quite defined spinning practices but never strays into orthodoxy, as some teachers do. Throughout the workshop she stressed that these were her methods, perfected for herself and used to obtain excellent results. However, Jenny said we'd find many other approaches and encouraged us to find our own methods.

Jenny teaches by explaining, showing, demonstrating and sharing so much material that one has weeks, even months of 'homework', if so desired. Every time I take a spinning class I'm overwhelmed by the teachers' generosity and enthusiasm. They all give so much of themselves and eagerly share their expertise. They also understand that the students are making what is for many a huge investment of time and money. A classmate told me that she and her friend had agreed that they'd gotten their money's worth by the end of the first day. Those signed up for her SOAR class are in for a big treat.


I'm a plodding sort of learner who likes to explore something quite thoroughly before going on. Luckily the class wasn't structured to go according to my rhythms or else we wouldn't have gotten much past Friday! Because Jenny explained everything so thoroughly, I quietly put my fiber samples in little plastic bags with relevant notes and know I can practice on my own.


The Techniques Jenny Stresses
* Always make a ply sample when beginning a new yarn spinning project. Keep it as yarn stored even a day on the cop or bobbin will relax too much to give a true ply-back.
* Card carefully and pay attention because it's important to do it well. Remember, fiber prep is the key to good spinning.
* Plying takes concentration. Give yourself the time needed and avoid distraction. Jenny showed us how to count as you pull the plies toward you and then let then in (3 or 4 up to your body, 3 or 4 into orifice). The hand separating plies oughtn't to be forward.
* Always, always pull out fibers from the end of a roving, sliver, etc. to check fiber length before carding and spinning.
* Fudging joins (of which I am guilty) while spinning silk results in wrinkled, fibrulated yarn, especially in silk
*The 'yarn package' is very important to plying. I'm not so clear about this but it somehow involves the additional step of taking the yarn off the cop of the spindle or the bobbin before plying. That I learned makes a big difference.


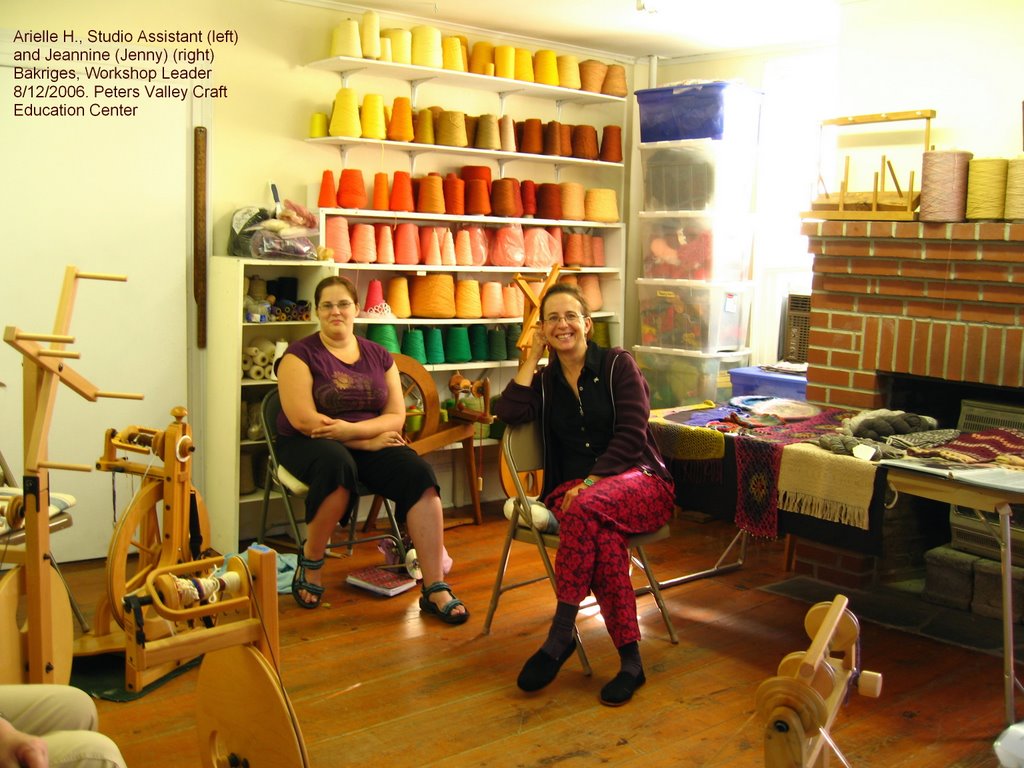
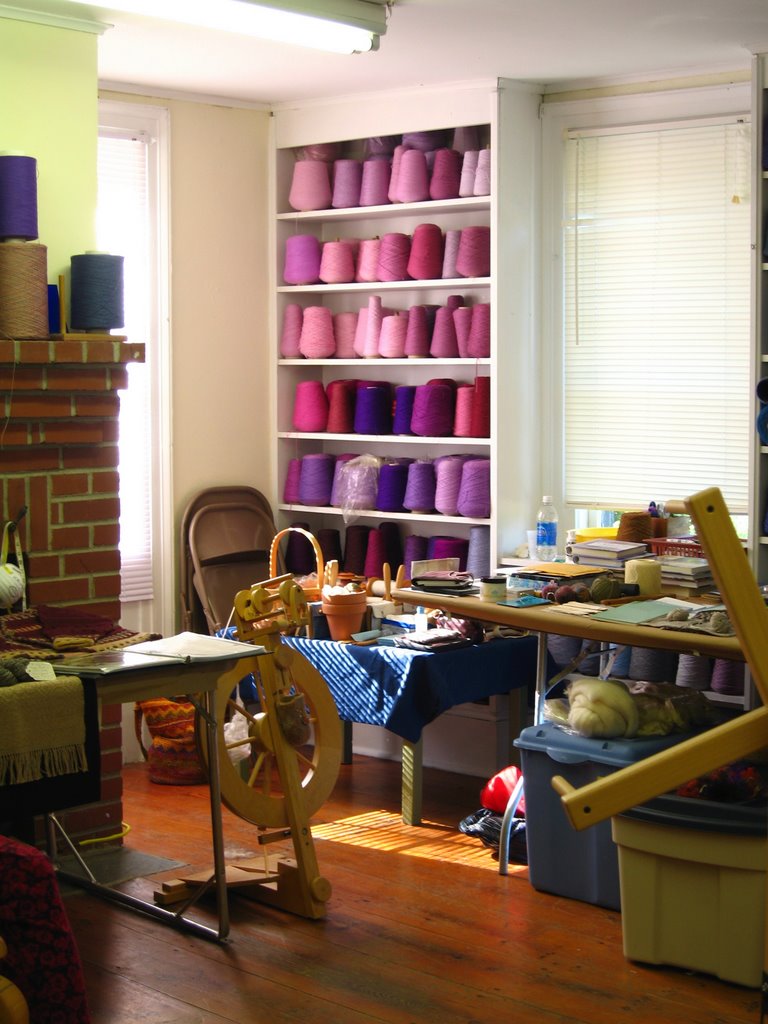
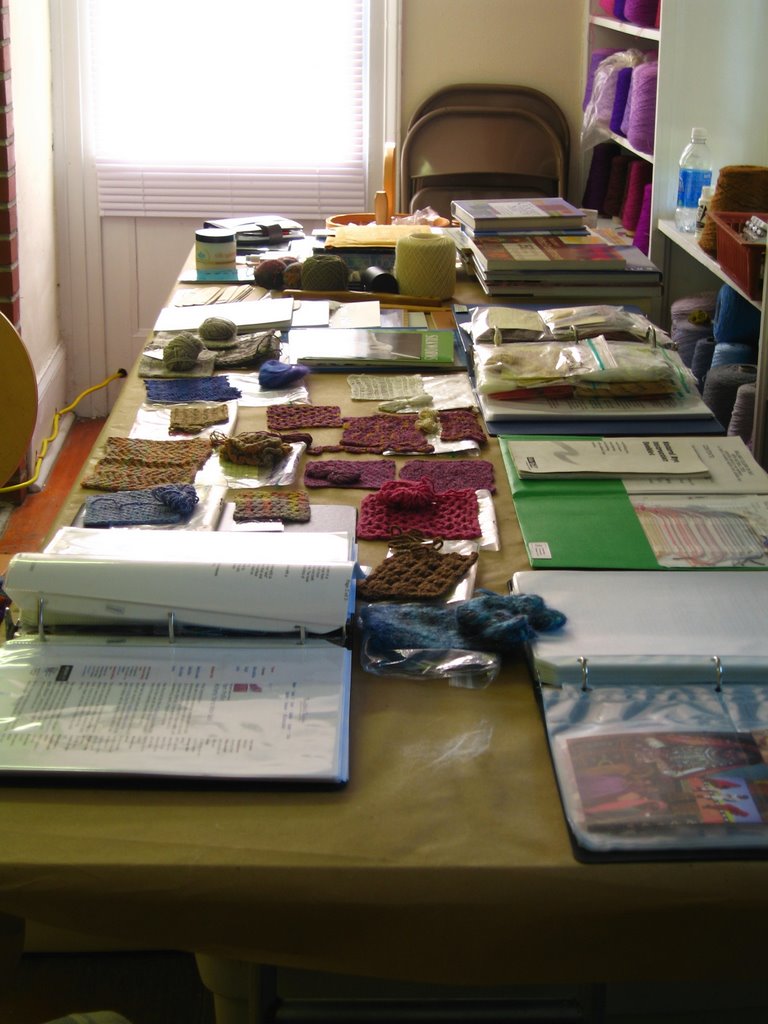
What The Workshop Covered (Order Is Subject To Quirky Memory Kinks)


Friday Morning
First of all, we walked into a room revealing hours of preparation Jenny had put in. She'd even hung up a poster about making silk she'd especially ordered from England. Two long tables were set up with with samples of her beautiful work we've all drooled over in SpinOff, many labeled swatches, books, looseleaf binders. I confess I didn't spend enough time looking these over.
Morning
Fibers handed out:
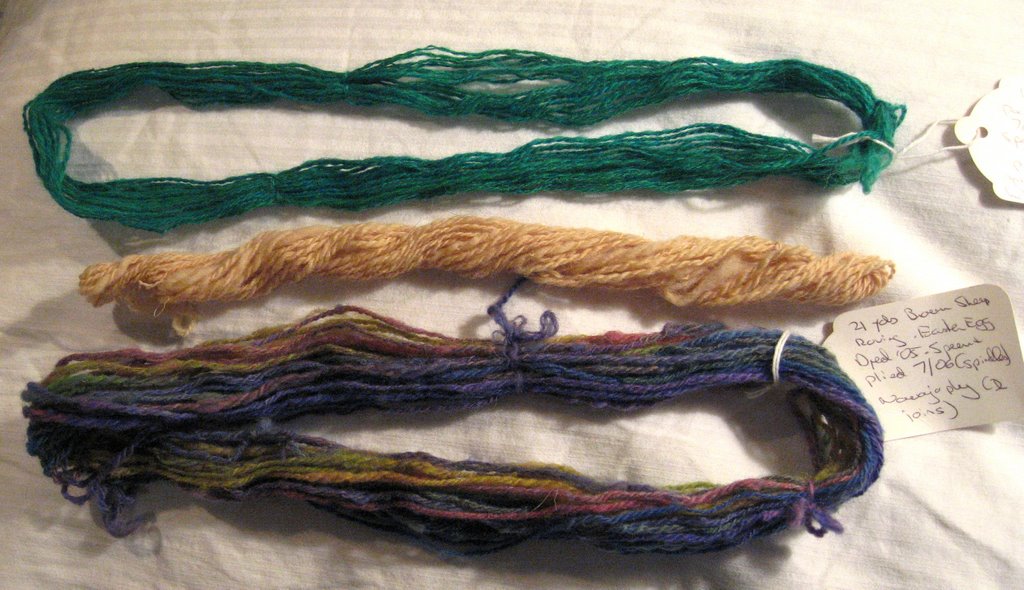
(I dyed all three of these on Sunday with indigo. The little skeins are all sitting in my kitchen, "curing", awaiting their rinse tomorrow evening.
*80% merino/ 20% silk. I spun this very loose and soft; it should have been more tightly spun.
*silk and cotton -- I made a fine, little skinny thread.
*tussah -- I just love the feel of this and the ease of spinning
*Bombyx mori -- lovely
*silk/angora/merino (haven't done it..)
While we were spinning away, Jenny read and spoke about forms of silk and its properties. Meanwhile Arielle, under Jenny's guidance, was "cooking up" the cocoons we were to use that afternoon.

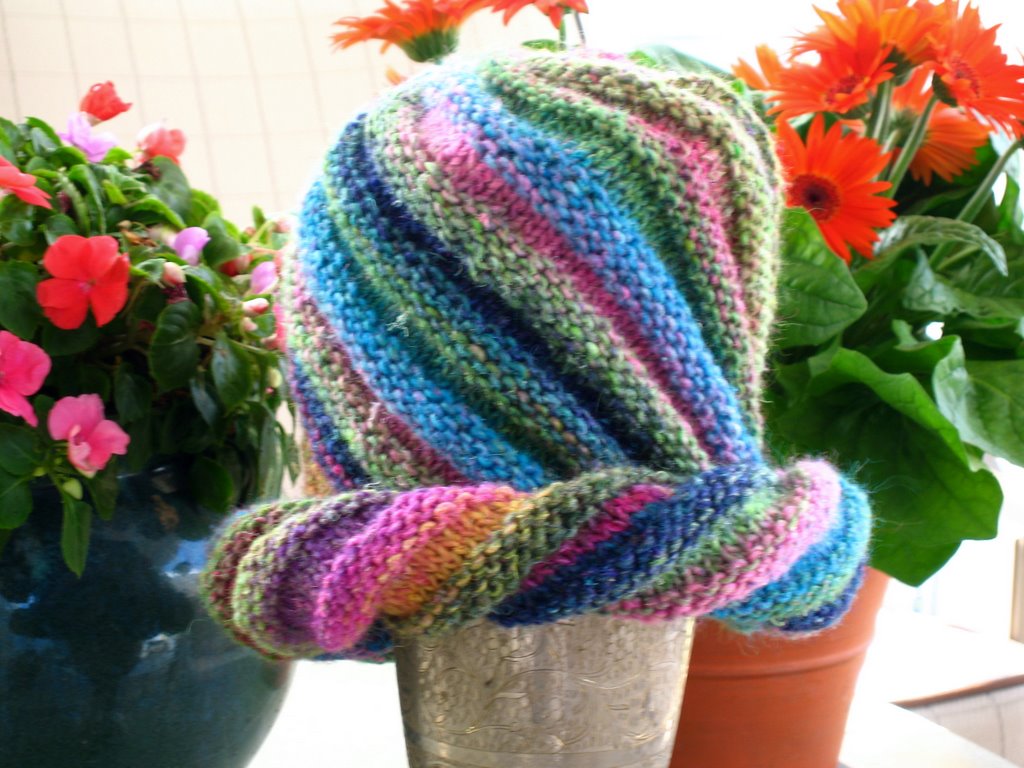
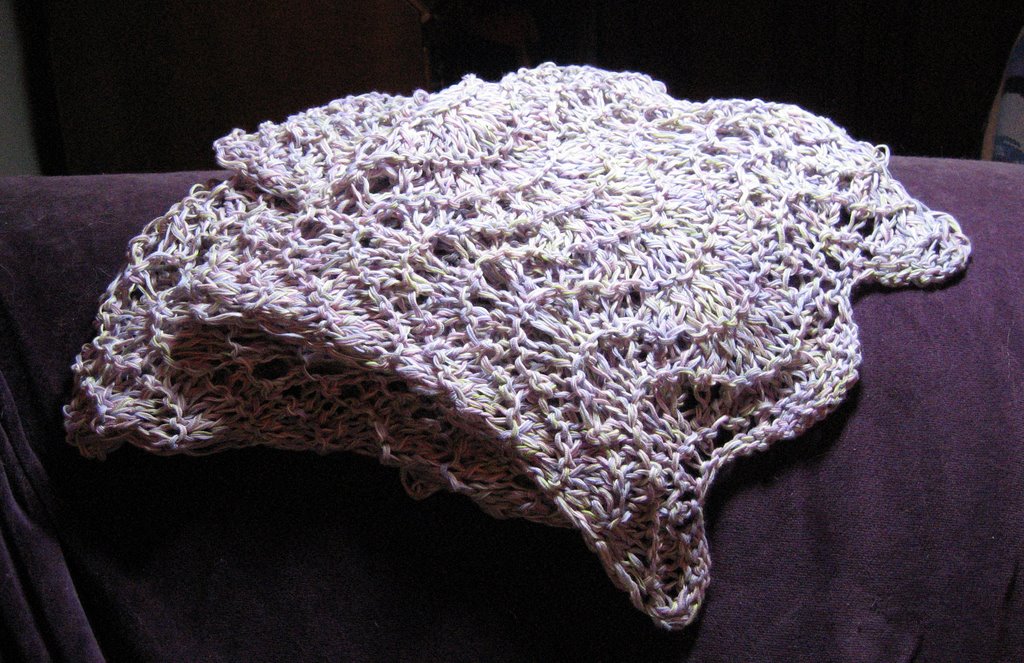
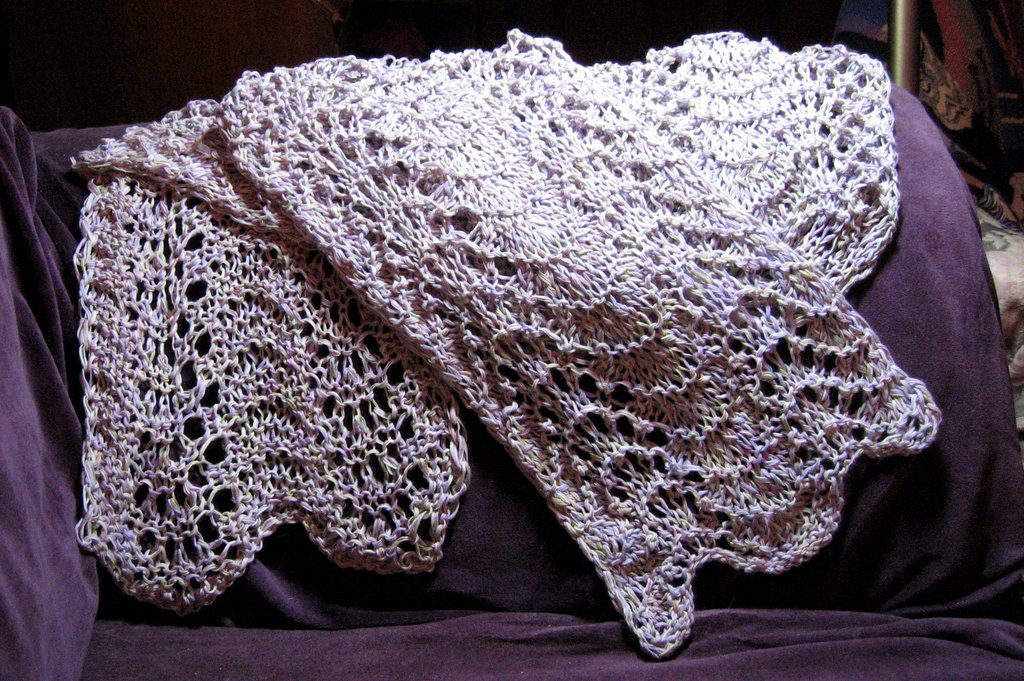
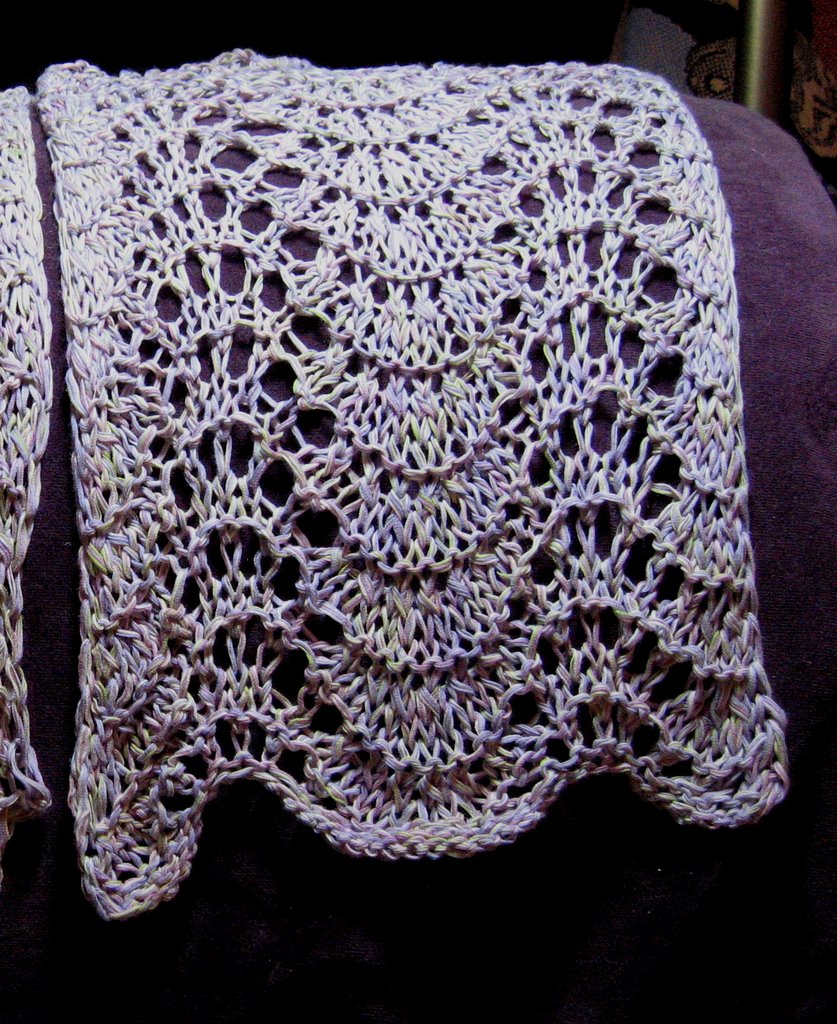
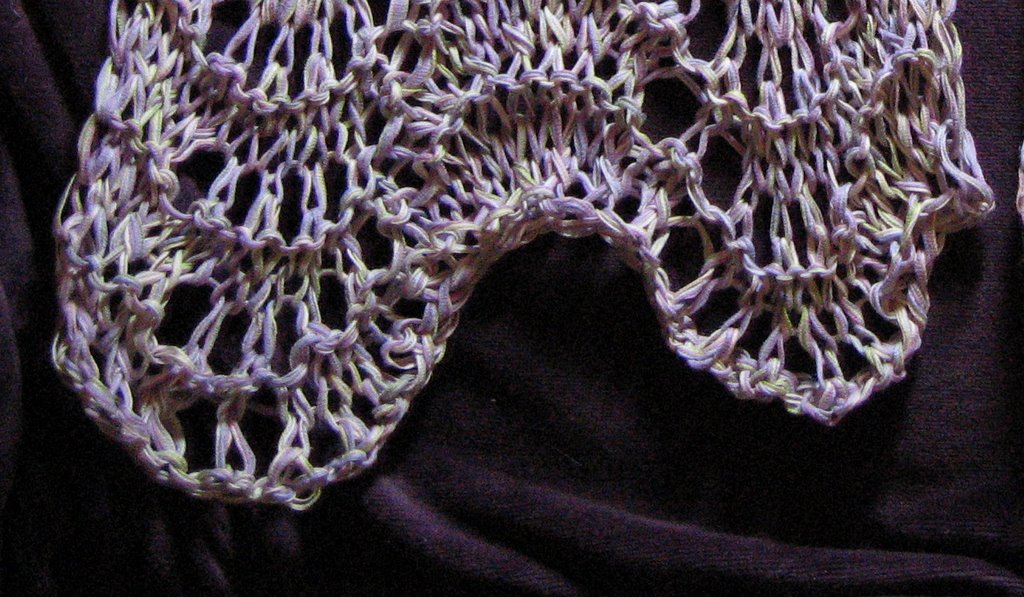
Jenny put out 4 oz. bags of silk roving in various colorways and let us each choose a number from a (of course felted) hat. I was lucky to pick #1 so I got to select first and won a beautiful deep fuschia and blue combination. Jenny had dyed all these when she was co-owner of Copper Moth. She gave the class a challenge. We are to spin the silk, make a scarf and share the results sometime in the future. My idea of homework heaven.
Friday Afternoon
* Sari silk -- I spun it into a tight, cord-like little skein
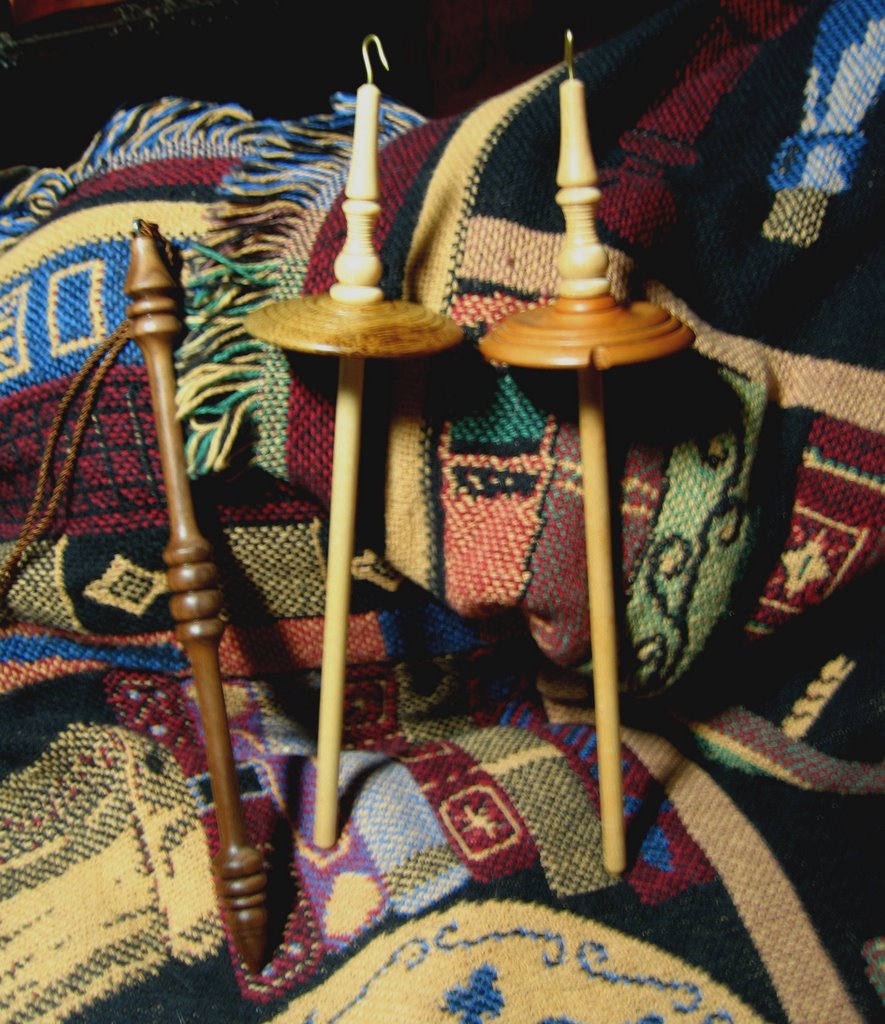
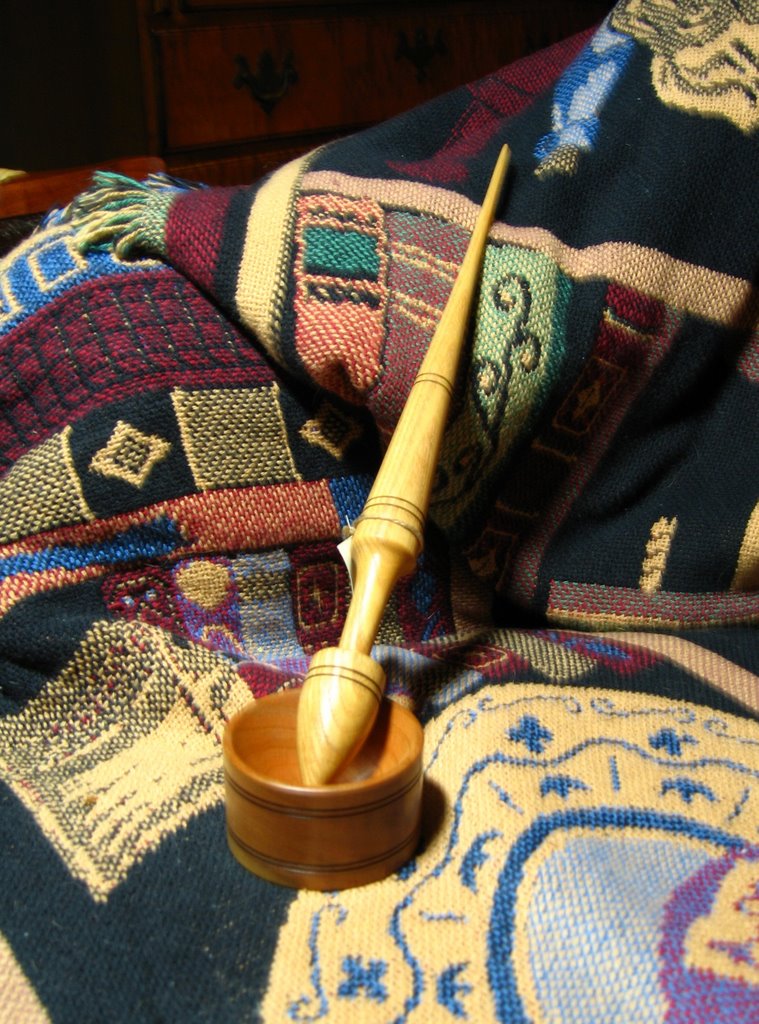
*We each received one of the cocoons Ariel had prepared. Our task was to remove the pupa and pull the silk into a usable form. Some people spun theirs but Jenny suggested that I try to knit it up unspun. I pulled out the silk, wound it on a little wooden distaff and took it home to knit that evening.did and sill post about it later.gave us one processed cocoon. I pulled out the silk into a continious strand but didn't spin it. Instead, I wound it on a distaff and knitted it up that evening. I'll post a photo eventually.
* We pulled apart a dyed hankie into its layers and spun it. (I have one layer left)
* Jenny took out a large package of lace hankies and gave us each a few. (I haven't spun it yet)
* Jenny had us take apart a silk cap, too. - yet to be spun.
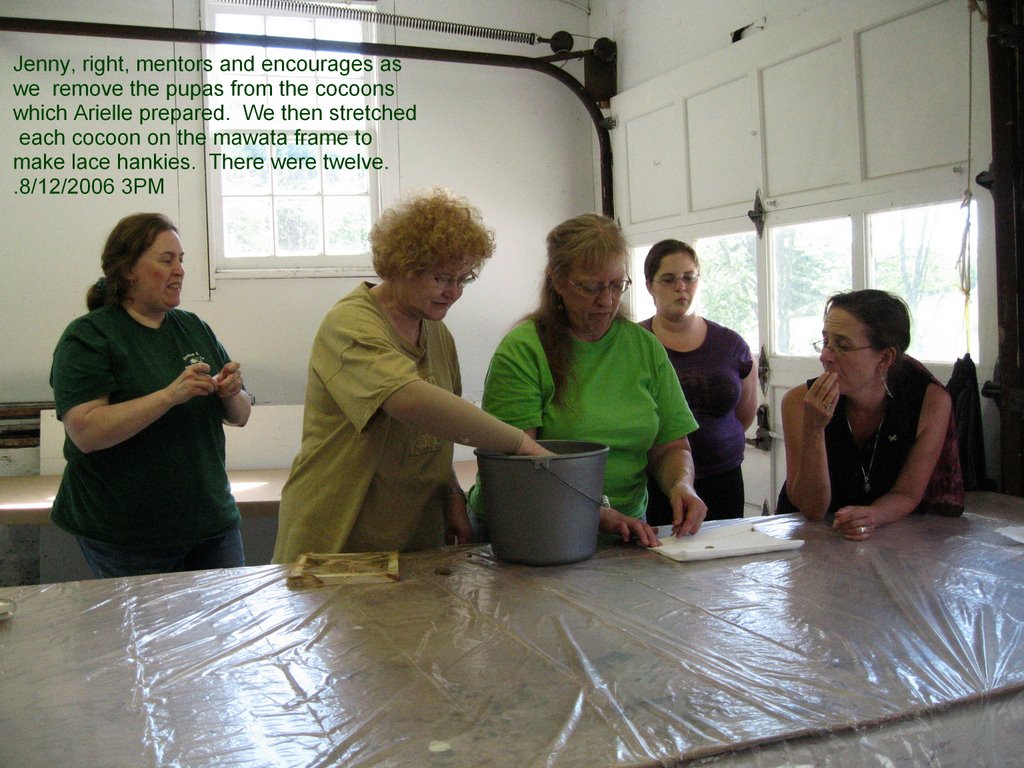
* Using the rest of the cocoons prepared that morning, we removed the pupas and other detritus and stretched the silk out on mawata frames to dry. There were about 12 layers. (See the third photo.)

Saturday Morning
Fibers distributed:
*Camel & silk -- I have three skeins as Jenny suggested I try it at varying thicknesses.
* cotton and cut silk -- not yet spun
We worked on carding and I almost learned it. I love Jenny's method but as I got tired I reverted to the one I'd learned last year in Andrea Mielke's class at MAFA. I think hers is based on Mabel Ross?? I wanted more practice but there wasn't enough time. When I'd gotten the materials list I bought, on Jenny's recommendation, the large Louet cotton cards. They are really wonderful and easy to use.
We made rolags, cigars and some have have made batts. Among the fibers we carded were:
*50%silk/50% cotton cochineal dyed by Jenny and made by the class into punis on the stick she gave us.
*Romney and Tussah, I only made one nest; the rest is waiting.

The fibers available to combine with our cards:
These are the ones I haven't gotten to and can't wait until I do: Medium (gray) coopworth; more Tussah; Yak -- will card with either tussah or bombyx mori; Alpaca - will card with camel/silk blend; "Multicolor silk blend" by Treenway, floor sweepings from silk mill which I'll Combine with some grey fibers; Hemp, very sturdy; Mohair
(Plan: combine mohair, medium coopworth and multicolor silk blend?); Tussah noil; more Bombyx mori; more 80%merino/20%silk
Blended but not spun:
*I carded fuschia corriedale with bombyx and made it into nests from the cigars - not yet spun.
*I carded a lovely 85%merino/15% silk by Gaywool in "Camellia" carded with "Sparkle. White", a glittery polyester. Nests in bag waiting to be spun.

While we drooled over the array of choices and tried to choose among them to spin, Jenny demonstrated and talked about plying. I'm trying to take in all the information as this is definitely an area where I do need to work. Jenny showed us the "Magic water test", used to find the plyback of "dead yarns". We learned that silk will sometimes not ply back properly when too relaxed.
Below: Classmate B. with her wild moth silk stretched on the mawata frames. This is very special, rare expertise so we were all thrilled.


Sunday
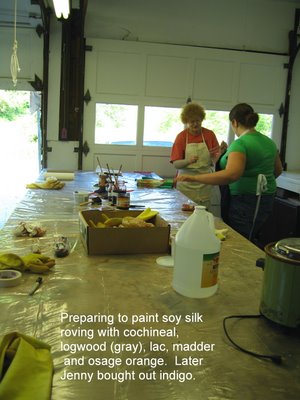
After initial chatting and information exchanges, the class watched a video made in England about the silk industry. Short and informative. Then we traipsed back down to our "wet lab" to space dye lengths of soy silk roving with cochineal, logwood (grey), lac, osage orange. Indigo was brought out at the end. I divided mine into 6 strands and tried for a greenish shade on one by combining osage orange (?) and logwood gray. Since I had gloves on and no notebook at hand, I haven't a clue. Eventually I'll post a photo of the soy silk rovingettes.

Sunday's topic was artifically produced silken fibers. First I spun space-dyed 'Kareoke' in "Rainbow" by Southwest Trading, a soy silk and wool. Jenny gave us little felt balls to wind the yarn on to be steamed and relaxed. I do see the advantage to relaxed yarn because it was much easier to Navajo ply later. Unfortunately, because my loops were quite long, the colors barber-poled and became muddier than they'd been on the ball. I haven't yet tried the "Magic Water" trick to wake up the twist and balance the yarn.
FIBERS DISTRIBUTED
A. Not used yet
Soy silk; Uncarded nylon "fake cashmere" by Louet; "Eco Pet", uncarded polyester from recycled bottles; "Optim" -- super processed wool; Bamboo; Silk latte; purple inego roving -- all the class but M. despised it. I didn't try it; 50%superwash/50%tencel in "Truffle"; Littlefarm's open uncarded Tencel; degummed "throwster' silk waste.

Monday, August 14, 2006

Spinning Silk with Jeannine (Jenny) Bakriges

This weekend I took a 3-day workshop with Jeannine (Jenny) Bakriges, "Spinning Silken Fibers" at Peters Valley Craft Education Center in Sussex County, NJ. The setting is perfectly gorgeous, in the Highlands area of NW NJ. It's on land originally confiscated by the Federal Government but now part of the national parks system when the project to build a dam on the Delaware River was strenously opposed.


Workshops are taught in abandoned, somewhat funky but always charming farmhouses. Our house, designated 'The Weaving Studio', is marked by a huge ball of yarn on the tree stump in the front yard. Because the classes are always small the intimate space works well. What must have been the little house's living room just accommodated seven spinning wheels and Jenny B.'s stash of goodies for us. The cool, breezy weather and clear light helped make it a idyllic setting. The "wet lab" is the former garage, brightly lit, well ventilated with running water and electricity.


I'll describe the full extent of the curriculum in my next post.

Monday, August 07, 2006

De-stashing, the Family Way...plus a spindle report


My latest spindling treasure from The Wheel Thing.
Top: Russian Lace Spindle; Bottom: Wrist distaff and two spindles by Forrester. Click on the link to my Flickr page if you want to know more about the spindles.
By the way, ask me if I know how to spin cashmere. Or, if I even have any. At least I'm prepared. You never know.

The Advantages of Crafty Offspring
Do you know the best way to de-stash, deaccession, simplify your life, make room, etc.? Have a knitting daughter. DD was kind enough to take my complete set of 40" Addi-turbos, 2/per size from 0 to 5. I had acquired them in the early (and mistaken) throes of magic loop enthusiasm. Now that I am happily reconciled to my 5 little sticks, the needles needed a new home...didn't they? She was also kind enough to relieve me of 3 sock yarns I no longer wished to knit. Now that I have discovered the joys of Hill Country, Helen's Laces and Blue Moon. Anyway, it always makes it feel like less of a waste if I can give it to my kids. I have to confess that my son was heard telling his friend as they were leaving after a holiday, "see if you can get out of here without her trying to give you something!" I'm only sorry he doesn't knit.

Spindling Dunce Moment
I was having a real beginner flashback this morning as I tried to spin soy silk on the heavy Satine Natalie. It had to fall about 867 times and bend its little hook several dozen times before it clicked: this was a typical 'spindle too heavy for the fiber being spun' problem. Duh. By this time I was hating the soy silk (which is soooo flyaway!) and thinking evil thoughts about this previously very favorite spindle. So, I switched to the lightweight Phil Powell 15 to find, to my horror, that the very thin wire hook had been totally bent out of shape, as I had predicted and feared. But I got out my trusty needle nose pliers and fixed it. I hope.

Saturday, August 05, 2006

Birthday Present for My Sister

A simple Feather Fan Scarf. Dimensions: 88" x 9" (12" when stretched out) Materials: 3 balls (almost all) of Malva by Filatura/S.Charles; 50g/1.75oz to 100m/110yds in color #1, a lovely 85% cotton / 15 nylon ribbon yarn. To see the subtle gradations of mostly lavender with light green accents, click on image to enlarge it. Knit on #11 Lantern Moon wooden needles. This is one of my favorite spring/fall scarf yarns and this is the third scarf I've made with it. Malva in red is waiting me to make a scarf for myself unless, like this one, it calls to become a present.

Above, the scarf all folded up. I didn't block it but if I had it'd be shorter and wider, more of a shawl than the accent scarf I intended.

Below, WS (wrong side) on the left, the diagonal section displays the RS (right side).


The photos below highlight the difference between the cast on (top view) and cast off (bottom view) edges.


There's something funky going with the last stitch that I fixed after I took the picture


Pattern Using knitted cast on, cast on 38 stitches. Feather and Fan uses multiples of 18 st plus 2 st and is a 4-row repeat. For the edge I use my favorite chain edge stitch. The whole thing is very easy to memorize. On next row start pattern
Row 1. On RS chain edge first stitch. K2tog 3 times; yo,k1 6 times; k2tog 6 times; yo,k1 6 times; K2tog 3 times; do chain edge slip stitch.
Rows 2 and 3: K the whole row (Remember the chaine edges)
Row 4: (WS) Purl
Begin with Row 1 again and repeat until all your yarn is used up, you're bored or the scarf is long enough. Cast off, ideally, after a row 2 in order to have the garter ridge at the end.

To widen the scarf or make a shawl, simply add 18-st repetitions, being careful that the rows (not including edge sts) begin and end with K2tog 3 times.

Tuesday, August 01, 2006

The Mystery Solved and Some Spindling


Thank you, Janet Lynn, for identifying the Phil Powell spindle I bought from you! I'm bound to try it, as fragile as it seems.


These are three little skeins I spindled spun and plied this weekend. The green skein on top comes from a batt used as packing material by Linda Diak in a package I received from Grafton Fibers this winter. Lovely, lovely stuff -- I'm assuming dyed by Linda. I'm thinking it may be BFL. It spins up so beautifully with a great crimp which allows for a tight, fine yarn. Both the gold and the bottom variagated are spun from Brown Sheep wool roving.
I dyed the gold fiber at North Country Spinners' "Dye Pot Day" last August with cutch. Although somewhat nondescript, it's a neutral tone that could be useful when combined with other natural dyes. I used a bit of the roving to work out the kinks on a Natalie spindle with a bent hook, trying for a lace weight yarn. It may be lace weight but it's not at all balanced.

The variagated skein was an overlooked part of my Easter Egg dyeing project. These colors seemed muddy in the roving but spun up pleasantly muted. I Navajo plied them to keep the colors together and avoid the barber pole effect.